13 Gallery Wall Ideas With Tips for Room Layouts
By Interior Designer Tracy Svendsen | Published on February 22, 2024 |
Gallery Wall Ideas: Few things are as perfect as a well-appointed gallery wall. No wonder it’s an interior designer’s go-to solution. An art or photo gallery wall provides the ability to create a flexible and customizable narrative that can be added to and improved over time.
Gallery walls instantly add a sense of style and sophistication to a blank wall and are the perfect way to bring in color, shape, and form. It’s also not as simple as choosing a few pieces of art in different sizes and randomly clustering them together.
Curating a collection that works is a real art. Gallery walls are also becoming more popular and have become a huge hit on Instagram. They’re the perfect way to add to a large empty wall or provide a curated feel to a small space.
“There are few design elements more photogenic than a well-hung gallery wall. It should come as little surprise, then, that so many of our favorite designers take to Instagram to show off the salon-style hangings they create for their clients and themselves. Those outside the design community have taken note, too: Search #gallerywall on Instagram, and more than 130,000 posts appear, showcasing the broad range of this style.” ~ Architectural Digest
Here is a step-by-step guide for transforming your wall into a personal gallery that compliments your space while telling an authentic story. Feature image courtesy of Aker Interiors.

Gallery Wall in the Entryway of Kerry Washington’s Home
Image courtesy of Architectural Digest

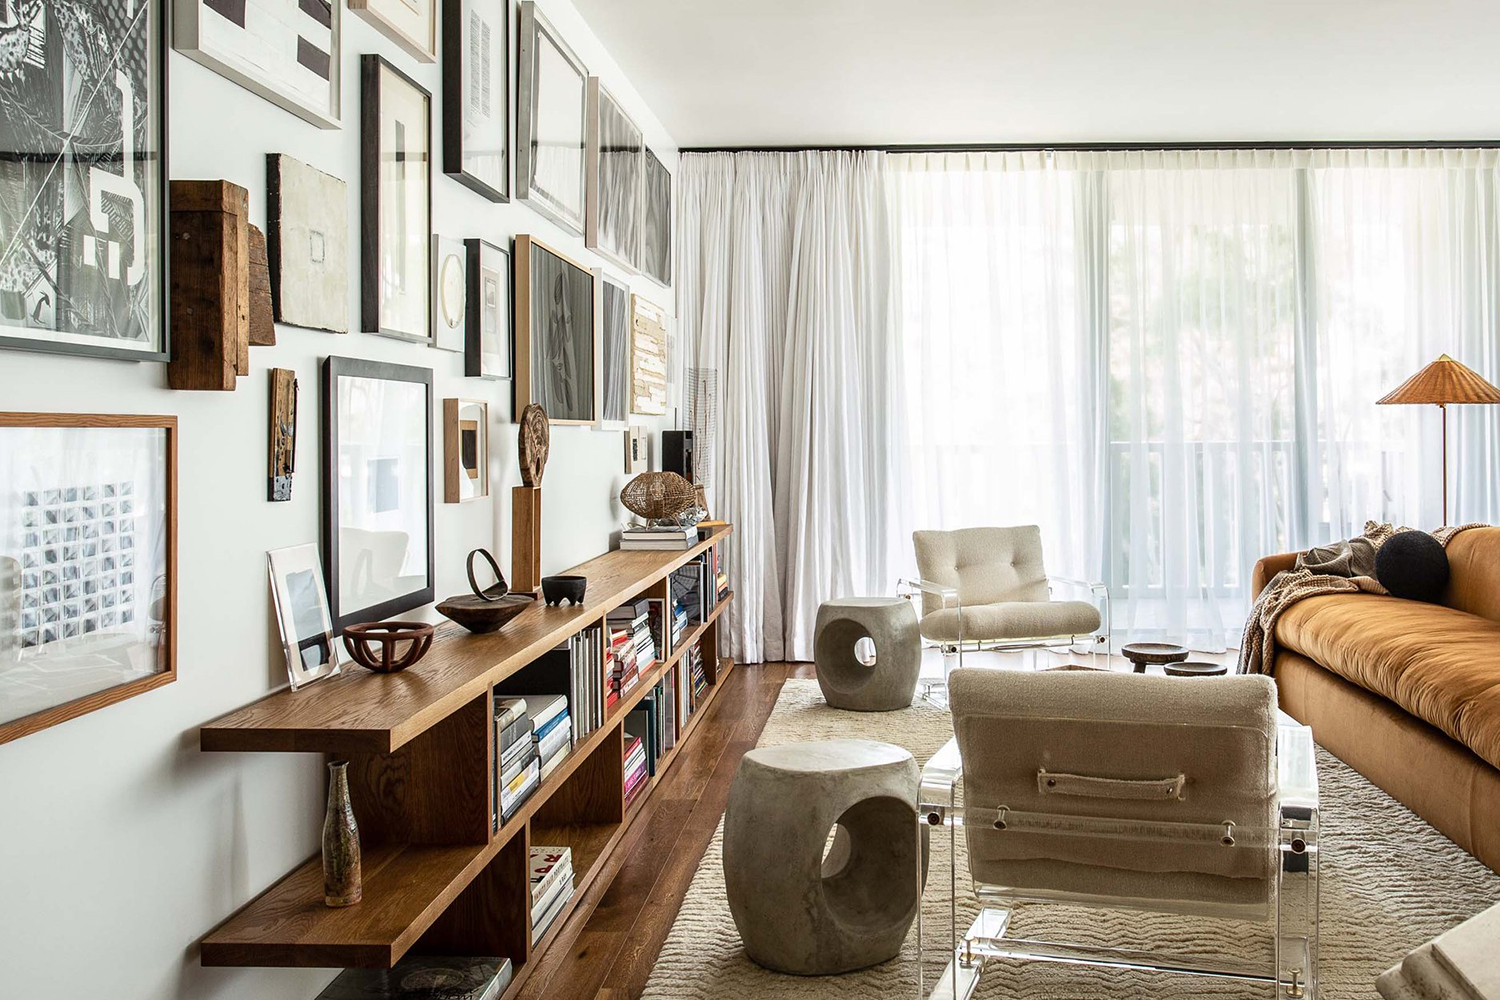
Eclectic Gallery Wall
Image courtesy of the Lifestyled Co.
1. Choose Your Style & Color Scheme
The first step in a gallery wall design is to choose your design style. We all have varied tastes, and it’s important to consider the artwork you’d like to display that represents your personality and style. Are you looking for artwork with a kaleidoscope of color that adds energy to your space or a sophisticated arrangement of soft and subtle hues?
A trick of the trade is to choose a single hue in varying tones that tie a whole room together. A favorite color can be a common thread throughout the gallery wall.
You can also create the same cohesive look with saturations that include soft and bright colors. The key to designing a composed gallery wall is finding the right balance of artwork, framing, and spacing between the elements.

Gallery Wall With Colorful Artwork | @renovating_love_lane
Image courtesy of Good House Keeping
2. Coastal Gallery Wall
For a coastal-style gallery wall, start by selecting artwork that features ocean-themed elements such as sea creatures, waves, or beach scenes. You can also include pieces with a coastal color scheme, such as blues, greens, and sandy neutrals.
When selecting frames, consider using a mix of natural materials such as wood or bamboo to create a beachy vibe. Think about incorporating different frame styles and sizes to add visual interest.
For the layout, consider an asymmetrical design that mimics the organic flow of the ocean. You can also use a grid layout with even spacing for a more structured look.

Coastal Gallery Wall Ideas
Image courtesy of Pottery Barn
3. Farmhouse Gallery Wall
For a farmhouse-style gallery wall, select artwork featuring rustic elements such as vintage signs, botanical prints, or animal portraits. You can also include pieces that have a neutral color scheme, such as whites, grays, and browns.
When selecting frames, consider using distressed or weathered finishes to create a vintage-inspired look. Think about incorporating different frame styles and sizes to add visual interest.
Add farmhouse-inspired decor, such as a wreath or a wooden sign, to tie the whole look together. The key is creating a cohesive design that complements the rest of your space while adding a rustic charm.

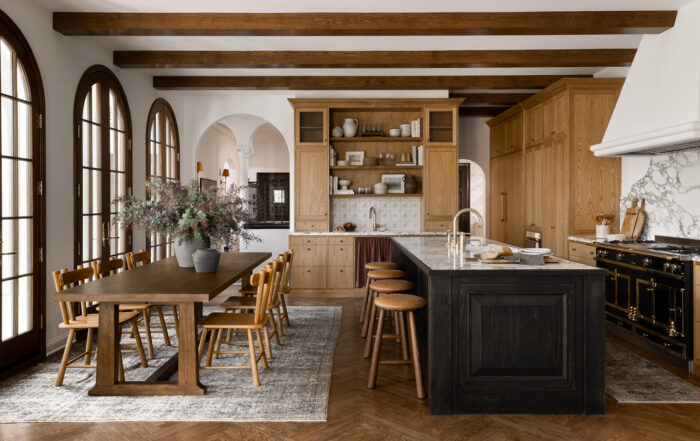
Farmhouse Gallery Wall Ideas
Image courtesy of Mindy Gayer Design
4. Modern Gallery Wall
For a modern and glamorous gallery wall, select artwork with bold patterns, graphic designs, and abstract shapes. You can also include pieces with a bright and contrasting color scheme, such as black and white with a pop of red or yellow.
Use sleek and minimal frames to create a contemporary look when selecting frames. Think about incorporating different frame styles and sizes to add visual interest.
Consider a grid design with even spacing for a clean and structured look for the layout. You can also play with asymmetrical layouts to add a touch of creativity and movement to the wall. The key is to create a cohesive design that complements the rest of your space while adding a touch of modern flair.

Modern & Glamorous Gallery Wall
Image courtesy of Atmosphere Design
Although the artwork, mirror, wall hangings, and brass lighting fixtures are not laid out on one flat wall surface, it’s a good indication of how these modern-glam elements work cohesively together.
5. My Design Process for Gallery Walls
I recently created two gallery walls for two separate clients who are sisters. I started the process by presenting several images of artwork to them to get a feel for what they were drawn to. Ironically, they chose the same pieces, although one lives in a small modern condo and the other in a large farmhouse-style home.
Once I understood what they envisioned for their gallery walls, we chose one large-scale piece to set the foundation for the other pieces. It made it easy to source artwork with a common palette and created a strong visual focal point to build out from.
Here are the items purchased that we used for the client’s gallery walls. We started with Lorraine Christie’s ‘My Complex Heart Print’; both clients wanted a print with umbrellas that brought in warm shades of tan, white, black, red, and orange.

Gallery Wall Ideas| Layout for Larger Home
Image courtesy of Tracy Svendsen
Each home has a neutral palette, and the gallery wall brings vibrant bursts of color. We began to layer in additional prints in various sizes to provide a ‘collected over time’ appeal. The images are watermarked at this point in time, as I saved them directly from the website they were eventually purchased from (without watermarks).
Although the first image shows all black frames, once we brought the images in to be framed, the clients noted the wide variety of options available; they both preferred an eclectic look. We pulled colors from the prints into items such as pillows, throws, and vases throughout the space.
Consider adding vintage family photos, vintage finds, line drawings, maps, mirrors, or 3D pieces. A unified aesthetic is essential; you want to ensure cohesion between the pieces and that they complement each other in some form.


At this point, if you are planning on purchasing wall art online, it’s a good time to start browsing for potential pieces you’d like to integrate. It’s a fun brainstorming process where you can be creative and slowly assemble items on your wish list.
Once you’ve determined the type of artwork you’d like to incorporate, it’s time to start thinking about the layout that appeals to you most and what items would go best with the size and shape of your wall.
6. Choose the Layout
The presentation of the artwork defines the overall feel. There is beauty in a well-organized, streamlined format and a random and eclectic art placement. Pottery Barn recommends six styles for setting up a gallery wall – from a simple grid to a staircase style. I thought I’d include them in this article, as it’s a great starting point.

Centered Gallery Wall: Center the two frames in the middle, then align the left and right sides with one another to create this balanced display. Shown here are two centered 8″ x 10″ with six 5′ x 7’s.

Spiral Gallery Wall: Start with a center frame and spiral out the rest of your frames from there. Shown here is an 8″x10″ in the center, four sets of three 4″x6″ on the corners with four 5’x5″ squares arranged in between.

Outer Align Gallery Wall: You’ll want to make sure all of the outer frames are aligned for this layout. Note that the center frames will meet slightly closer together at the right and left sides.

Reflection Gallery Wall: Create order out of chaos with this arrangement! Don’t worry about arranging by size — when everything’s matched up and aligned at the center, the display makes perfect sense.

Staircase Gallery Wall: Staircase gallery walls require a slightly different approach. Hang your frames following the same upward angle of the staircase.

Nine Square Gallery Wall: Don’t dismiss the simple grid. It’s a basic arrangement, but it makes a big impact!
7. Consider Framing Options
With images with a similar tone, such as a series of black and white artwork or a collection of drawings, it’s a good idea to mix up the size and finish of the frames. Consider matching the matting and frames if the pieces vary in color or scale. For a rustic or farmhouse design, wooden frames are the perfect choice.
Another trick of the trade is displaying the artwork in an odd number of pieces, such as a collection of three or nine, using a grid format. Many online art websites that sell art have a built-in option to view artwork in several frames of varying sizes and styles.
Frames should never be considered an afterthought as they set the stage for the art and are an essential part of the design process. Whether it’s modern frames with a graphic edge or vintage – they are part of the overall look and significantly impact the mood of the piece.
For a modern look, choose:
- white frames
- simple black frames
- modern metal frames
- contemporary metallic picture frames

Choosing Framing Options
Image courtesy of Emily Henderson Design
8. Purchase the Artwork
At this point, you should have a good idea of the overall look you’d like to achieve. This is the most challenging part, as there are so many choices available, and knowing what artwork would work best together can be difficult.
There are a few different options available for a beautiful gallery wall. As I mentioned earlier, I began by choosing a large accent piece. I prefer to shop online as it provides the best opportunity to source exactly what I want.
I start with one statement piece that sets the tone and expands from there. I also save multiple images of the art that I’ve selected and view them together in Adobe Photoshop. This is the process I use to determine a color palette and to choose different shapes and sizes that I know will complement each other. Another easy method is to purchase art from websites with an art gallery app or offer free curation services. Additional items that can be included are art prints and favorite photos for a personal touch.

Purchasing the Artwork
Image courtesy of Architectural Digest
9. Do a Mock Trial of Your Gallery Wall Layout
Once you find a floor arrangement, a great way to ensure everything fits well is to do a mock trial by cutting out the sizes and shapes of items you will add to the wall. Lay each frame (or wall art) on top of the paper, trace it, and cut it out. Brown craft paper or tissue paper work great.
Next, tape the pieces with painter’s tape to see if your composition is placed correctly and will look good on the wall. Experiment with different layouts and check to see if it is grouped around furniture nearby in a visually pleasing way. Is it set at the right height? Does it fill the space appropriately? Is there a cohesive mix of small pieces and larger pieces?
Use a ruler, laser level, or measuring tape to be precise, with spacing on all sides of the artwork. Grab a level to make sure everything is straight. All of this serves to diminish unwanted nail holes.

Lay Out the Artwork on a Flat Surface
Image courtesy of Mountary
10. Get Ready to Hammer
Once your display is complete, it’s time to determine where the picture wire hits the back of each frame when taut. This defines where your hanger should go. Nail picture hangers through the cutouts in the correct place, and then gently remove the cutouts and replace them with a frame.
Take a step back occasionally to see how it’s working together. Be sure to straighten and level frames during the process. You can use sticky tack on the back of frames to ensure they stay in position.
The best part is that gallery walls are made to grow! As you discover additional pieces you’d like to add, you can incorporate them into what you have already created.

Laying Out the Location of the Artwork with Craft Paper
Image courtesy of Mountary
11. Living Room Gallery Wall Ideas
For a gallery wall in a living room, start by determining what color palette would coordinate well with your existing decor. To make the process easier, choose one or two larger pieces that will act as the focal point of your gallery wall.
Add smaller pieces and fill any gaps with decorative accents like mirrors or sculptural artwork. Whether you choose to display family photo arrangements or your favorite pieces of art, be sure to include pieces that are great conversation starters and that you enjoy looking at every day.

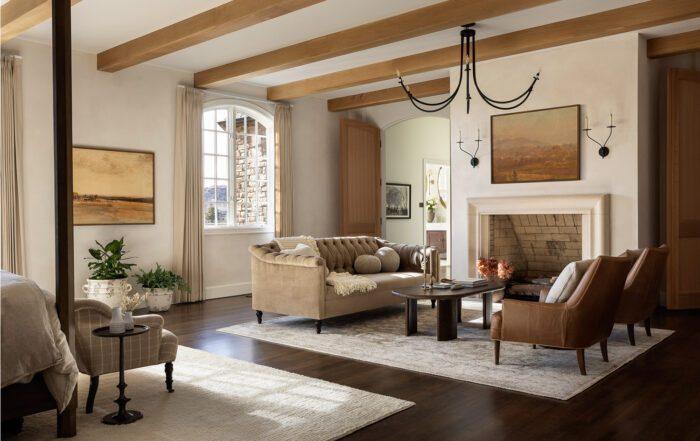
Living Room Gallery Wall
Image courtesy of Peter Dunham via Veranda
12. Dining Room Gallery Wall Ideas
Adding art to a dining room is a great way to elevate the space and create a more inviting and enjoyable atmosphere for dinner parties and family gatherings. When selecting artwork for a dining room, consider the room’s overall style and color scheme, as well as the size and scale of the artwork.
When selecting the subject matter for dining room art, consider pieces that reflect the theme or mood of the space. For example, a landscape painting or a collection of photos could evoke a sense of nature and tranquility, while an abstract piece might add a touch of modernity and sophistication. Ultimately, the goal is to choose artwork that enhances the dining experience and creates a welcoming and memorable atmosphere.
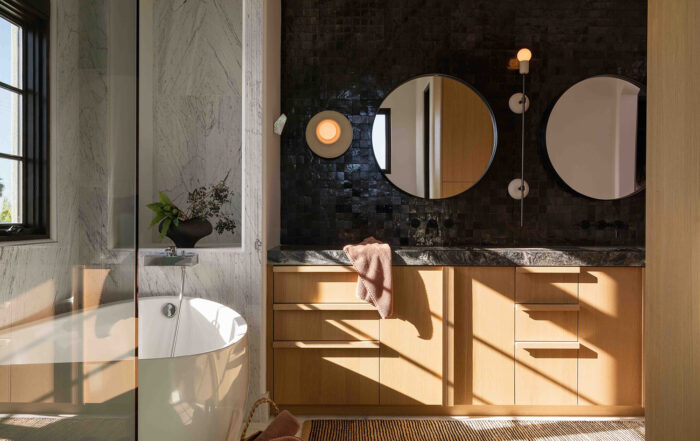
Spa-Like Bathroom Ideas
Image courtesy of Nicole Hogarty Design
13. Eclectic Gallery Wall
An eclectic gallery wall mixes and matches different art styles and frames to create a unique and personalized display. This layout allows you to showcase your personality and style in a creative and playful way.
To create an eclectic gallery wall, choose a mix of art pieces that vary in size, style, and color. Mix and match different types of art, such as paintings, photographs, prints, and even vintage pieces.
Opt for a mix of frames in different finishes, colors, and styles when framing to give your gallery wall a fun and quirky look. You can also experiment with varying frame sizes to add depth and dimension to your display.

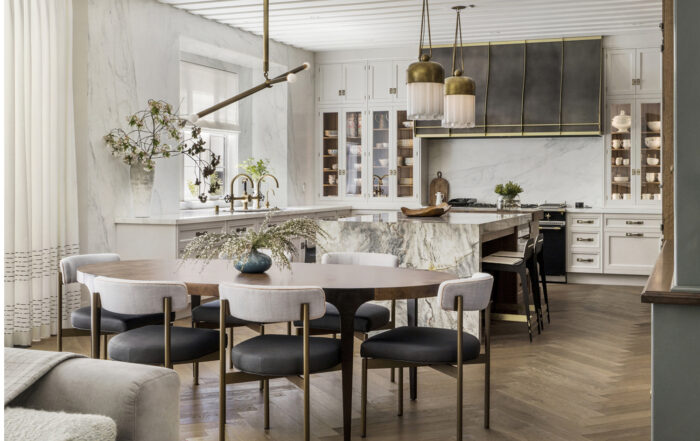
Dining Room Gallery Wall Ideas
Image courtesy of Becca Interiors
Happy Decorating!

Farmhouse Dining Room Ideas
Step into the world of top interior designers like Amber Lewis, Kelsey Leigh, Jake Arnold, McGee & Co, Mindy Gayer, and more. Here, you'll discover how they masterfully translate the farmhouse aesthetic into beautifully curated spaces.
Farmhouse Kitchen Ideas
Whether you want to create a more welcoming cooking space or plan a kitchen remodel, these ideas will help you design a kitchen infused with rustic elements and a connection to the outdoors.
Farmhouse Living Room Ideas
If you are looking for farmhouse living room ideas, you've come to the right place! This post focuses primarily on a modern approach to farmhouse design, with design tips and images of beautifully designed spaces.

Modern Decorating Ideas
Looking to give your home a fresh and contemporary update? Explore design ideas from top interior designers that will revamp every room in your home. Whether you're looking for a sleek and minimalist design or a bold and colorful one, I have included images of beautifully designed bedrooms, living rooms, kitchens, and dining rooms.
Modern Kitchen Ideas
If you want to transform your space into a stylish and functional haven, this article will take you through the top modern kitchen ideas that will revamp your home. I've included decorating tips and images of stunning kitchens in various design styles, from minimalist and contemporary to modern organic, and glamorous, with sleek surfaces.
Modern Bathroom Ideas
Few things are as perfect as a well-appointed gallery wall. No wonder it's an interior designer's go-to solution. An art or photo gallery wall provides the ability to create a flexible and customizable narrative that can be added to and improved over time.
